A Step By Step Guide To Using Concrete
Laying & Installing Concrete
Step 1.) How to prepare ground for a concrete pour
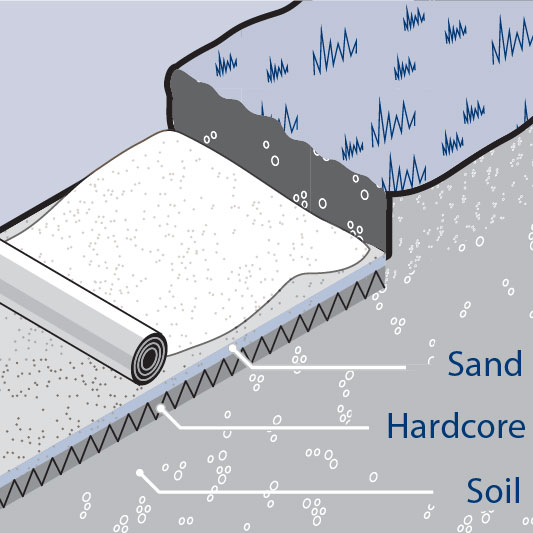
Firstly, clear the site. Prepare the site carefully by removing stones and weeds plus a layer of top soil. Level off bumps with a spade or rake to create a flat surface. Any top soil should be removed to the depths specified in the table (below right). Your base must be approximately 75mm larger than the finished slab to accommodate any formwork.
Readymix Concrete should be laid on well compacted hardcore sub-base, you should compact the surface with a tamper, roller or mechanical compactor. The compacted surface should then be covered with a thin layer of sand and a layer of plastic sheeting or damp proof membrane (dbm). The plastic sheet / dbm will prevents excessive moisture loss from the concrete (which can cause a lower final strength) and acts as a damp proofing, when used in concrete floors.
Estimating how much concrete you need
To find out how much Readymix Concrete you need, and obtain a “delivered price”, call your local sales office with details of the area to be concreted and average thickness required. Other information e.g. slope, drainage and accessibility may also be useful.
Alternatively you can calculate how much you need by using our concrete calculator
Groundwork for concrete pour (fig. 1)
Step 2.) Concrete Preparation
Formwork (fig. 2&3)
This is the frame which will keep the concrete in place as it hardens. 25mm thick timber strips are ideal. Nail them to wooden pegs driven into the ground at 1m intervals (on the outside of the formwork). Lay plastic sheeting over the area, and weight with bricks or stones.
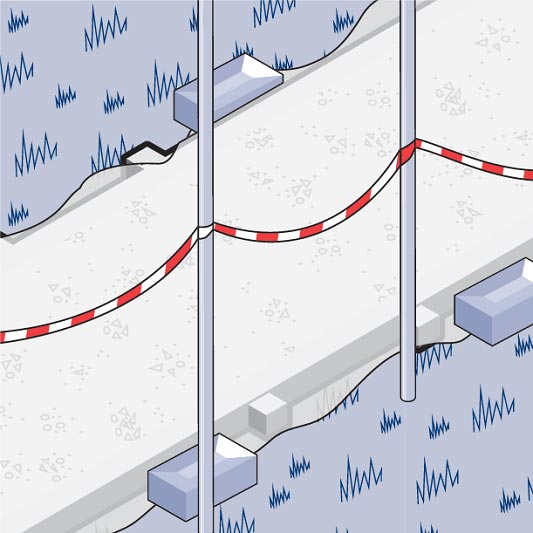
Setting a ‘fall’ (fig. 4)
Plan the slope to allow water to run off easily. Check the forms with a spirit level, and make one side lower to allow drainage away from buildings. Normally allow about a 25mm drop for a 1 metre run.
'Joints’ (fig. 5&6)
If the area you’re laying measures more than 4m in any direction, you’ll need to divide it into sections. Also if it is less than 500mm wide, the length should be reduced to 3m. Lay joints of softwood board about 10-12mm thick across the formwork, to the full depth of the slab, at the required intervals. Support them with pegs that can be removed as each section is completed. If your slab will adjoin an existing slab or building, make a joint between the two with a strip of thick bituminous felt.
Fig 2.
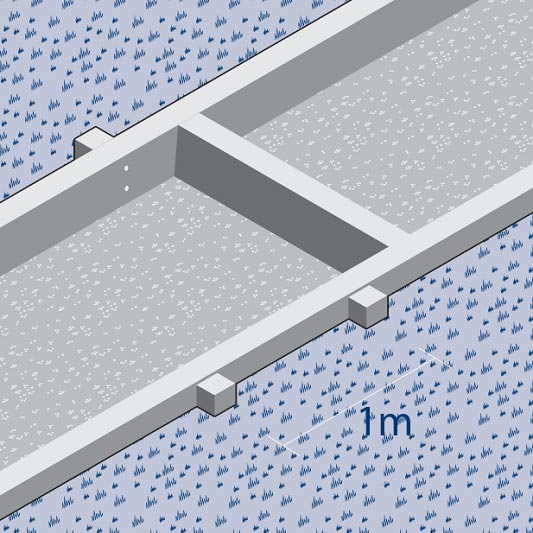
Fig 3.
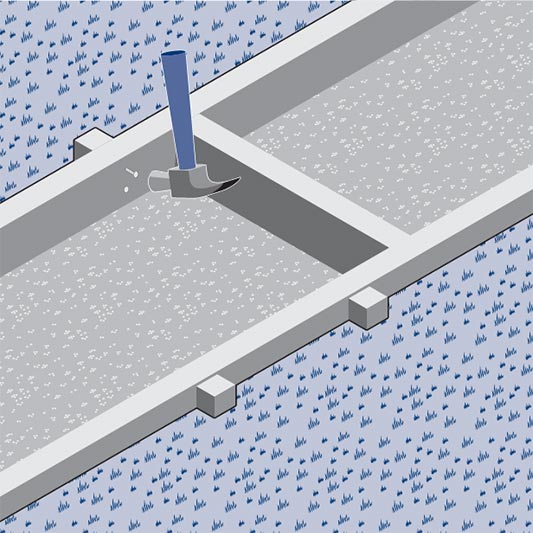
Fig 4.

Fig 5.
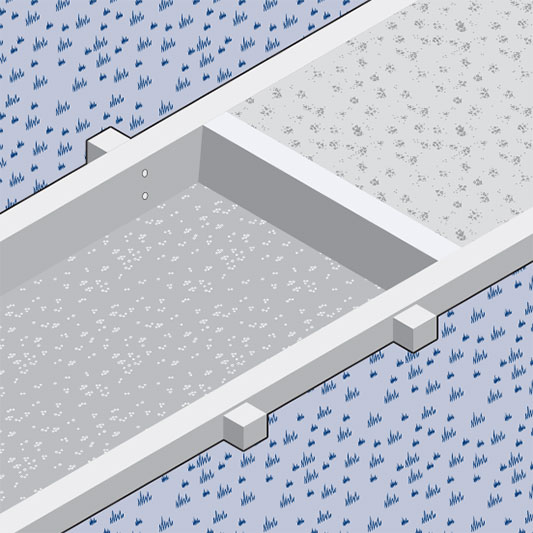
Fig 6.
Step 3.) Ordering & laying Concrete
When your preparations are complete, contact your local readymix concrete sales office with details of your order to arrange a delivery date and time.
Please remember that a fully laden truck mixer can weigh over 24 tonnes and that sufficient access is required to support this load and to let the truck mixer reverse into place for unloading.
Alternatively, Readymix conveyor trucks overcome delivery obstacles, allowing direct access to foundations etc. for easy placement.
Delivery
- Check the delivery ticket to confirm the correct concrete and quantity has been delivered
- Advise the driver where the concrete is to be unloaded
- Direct the truck-mixer driver to the point of placing
- Deliveries are generally scheduled one to three days in advance. Try to avoid the busy periods such as the early morning and mid-afternoon
- The job should be fully prepared for concreting prior to the truck-mixer arriving at site
- Sufficient labour should be arranged to handle the concrete – at least four people. Each cubic metre weighs about 2 1⁄4 tonnes – equivalent to about twenty five wheelbarrow loads!
- Ground conditions must be stable enough to take a heavy lorry. Paving slabs, domestic block paving, etc. will not accept the weight of a truck-mixer
- Sufficient tools should be available to place and finish the concrete and should include:
- Purpose-made tamping beam (for slab work)
- Shovels and wheelbarrows
- Steel rake for levelling
- Steel or plastic floats for final finish
- Stiff broom for applying a brush finish where required
- Polythene sheeting for base membrane and curing
- Brickwork, windows, tarmac, etc. should be protected against splashing
- Safety precautions and information regarding Personal Protective Equipment (i.e. gloves, goggles etc.) are given on the delivery docket and a Health & Safety datasheet is available to download from our website.
Spreading
- Spread concrete between forms to a level 10mm to 15mm higher than the finished surface
- Compact the concrete using a tamping beam
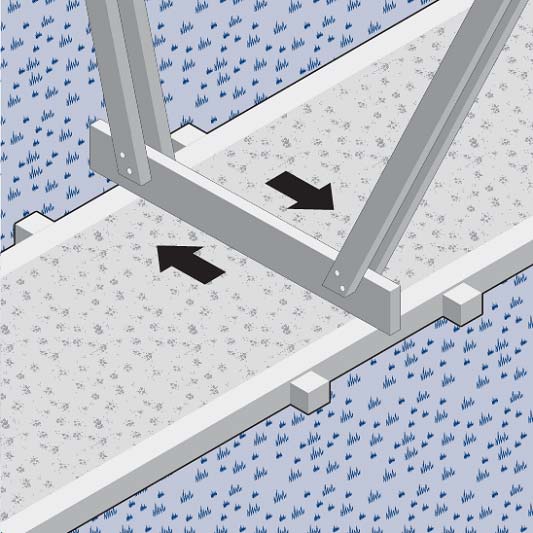
Levelling (fig. 7,8 and 9)
- On a moderately steep slope, work from the bottom upwards (order a lower slump mix, we can advise)
- With one person each end holding the tamping beam, lift approximately 100mm and then drop into the concrete ensuring that each end of the beam is over the formwork
- Level the concrete by ‘sawing’ the beam from side to side whilst advancing it slowly forward
- Remove excess concrete with a rake/shovel
- Level using rake to fill area 10-15mm higher than finished surface.
- Compact with tamping beam.
- Shuffle tamping beam from side to side to level.
Fig 7.
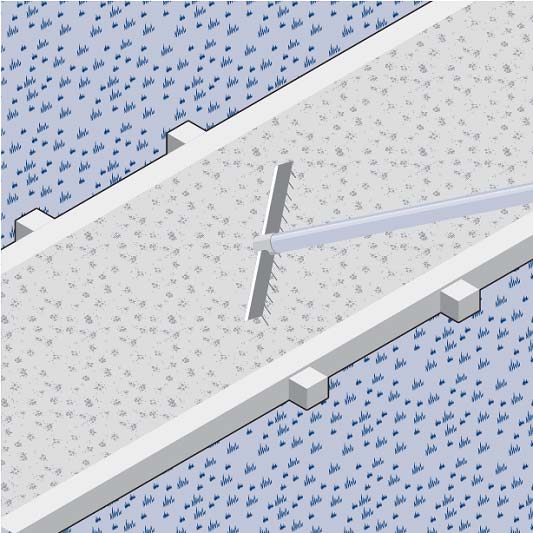
Fig 8.
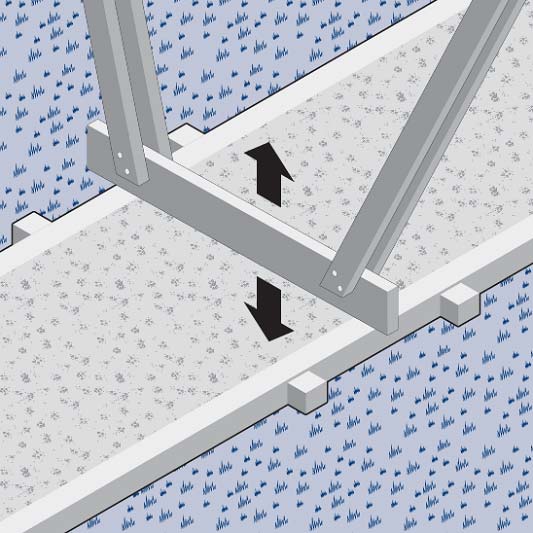
Fig 9.
Step 4.) Finishing & Curing Concrete
Finishing
- A tamped surface provides a rough low-slip finish suitable for drives, paths, external slabs
- A wood or plastic float finish provides a smooth but textured low-slip finish suitable for paths, garage and workshop floors
- A steel float finish provides a very smooth finish suitable for house floors, ponds, etc.
- A coarse brush finish is applied just prior to the concrete setting and is suitable for paths and drives where a rough tamped surface may be unsightly
Curing (fig. 10&11)
- Concrete must not be allowed to dry out quickly and must be protected from moisture loss immediately after placing
- Moisture loss can be reduced by covering with plastic sheeting
- Concrete should not be placed in freezing conditions and if the overnight temperature is likely to fall below zero, then an air gap should be left between the concrete and the plastic sheet. This can be achieved with wooden battens
- Ideally, curing should continue for seven days in summer and ten days in winter
- Specific advice should be obtained regarding the time to trafficking but as a general rule, foot-traffic after two days, vehicles after seven days
- Cover concrete surface to prevent drying out, or keep moist.
- Keep pets and children away from the site until the concrete has hardened.
Fig 10.
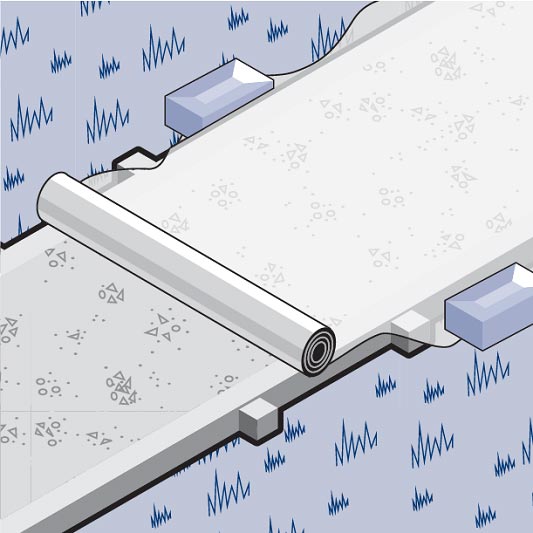
Fig 11.
Concreting TIP
By adding polypropylene fibres you will enhance the concrete mix and obtain the following additional features and benefits:
- Reduced plastic cracking
- No need for crack control wire mesh
- Impact and abrasion resistant
- Enhanced surface finish
- Longer lasting concrete
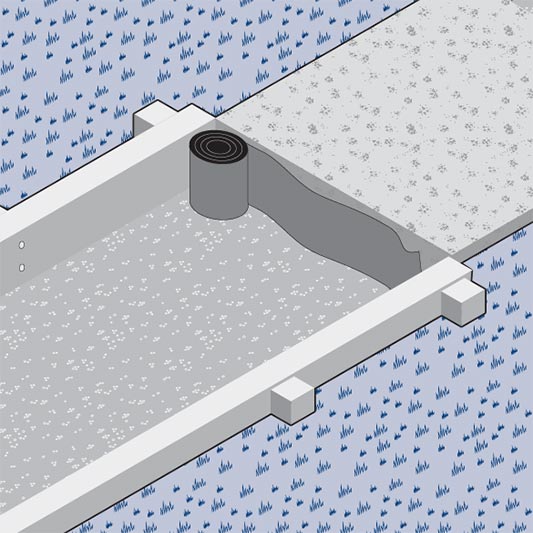
Preparation for rain
Avoid laying concrete outdoors in rainy or very cold weather. Ask your CEMEX office how much notice is required for postponement of delivery. If it rains before the concrete is hard enough to allow direct sheeting, use a frame to support the plastic above the surface of the concrete to prevent damage.
DIY Concrete - Frequently Asked Questions
Q: Can safety advice be provided prior to delivery?
A: Yes, a Health & Safety data sheet and a step-by-step guide to using concrete safely is available from our website
Q: How long will the truck-mixer wait at site?
A: Because of the scheduling of deliveries, it is helpful to release the truck as quickly as possible. The normal time allowed is ten minutes plus five minutes for each cubic metre. Therefore a full load of 6m3 could be at site for forty minutes before an additional charge is applied.
Q: How long do I have to place and finish the concrete?
A: Under normal conditions, concrete has a useable life of about 11⁄2 hours. However in summer it will lose workability more rapidly. Ideally, it should be placed and completely finished within 1 hour of discharge from the truck-mixer.
Q: Can an order be cancelled, for example if it rains?
A: Yes, provided that the load has not already been dispatched.
Q: Can I obtain advice on the correct type of concrete to be used?
A: Yes, providing there is no structural requirement we can advise on the types of mixes to be used for most jobs.
Choosing The Right Mix
With CEMEX Readymix you can be assured of getting the best quality concrete solutions for your DIY or homebuilding projects. Our range of specially designed mixes are perfect for use in many applications and include:
- Readymix Paving
- Readymix Flooring
- Readymix Foundation