ReadyPave® block paving can be used for a diverse range of applications, but you must always bear in mind the end use of the area you are planning. With driveways the stresses applied will be considerably greater than of a patio for instance, and for that reason the structure will be different.
Readypave® concrete block paving can be bedded on a coarse sand or alternatively can be mortared into place like bricks or paving slabs. Their close-fitting design means they can be held firmly in position simply by vibrating sand in between the joints.
Laying For Paths & Patios
Readypave® paths and patios can add interest and diversity to your garden but plan carefully. It’s important to have a plan of what you want to do and map out which areas are to be paved before you start.

90 Herringbone

Basketweave
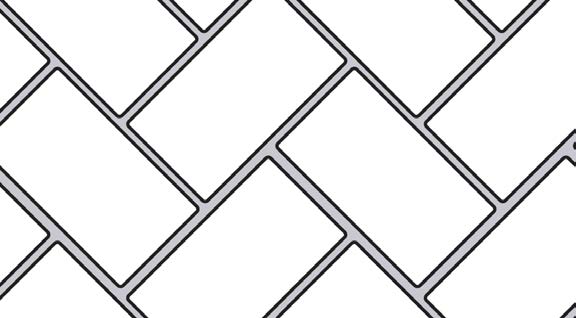
45 Herringbone
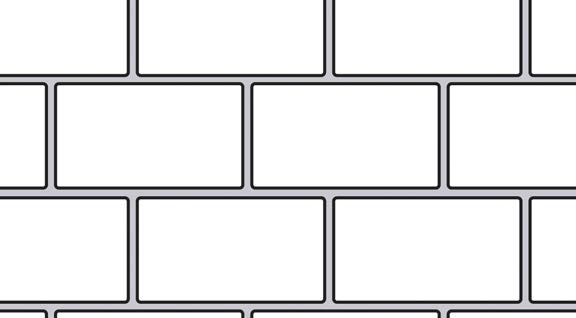
Stretch Bond
STEP 1
Mark out the shape of the paved area using a string line and wooden pegs. Strip away the surface debris in the marked area and dig out the surface to a depth of about 15cm (6”).
STEP 2
Compact the base with a post or heavy rake, but for large areas a plate vibrator can be hired.
STEP 3
The restraints of the paved area are made from concrete block pavers laid on their edge in a stacking bond, bedded on a damp mortar mix, checked with a spirit level. You can also use wooden battens secured in position – you will need to fix a temporary wooden batten against existing walls, to support the board used to strike the sand level.
STEP 4
When the edging course of bricks has set, the inner sections of the area are covered with a layer of dry sand 7-8cm (23/4-3”) deep. Use a length of wood to compact and level the sand, using the restraints or the temporary supports to determine the correct height.
STEP 5
Lay the pavers in the pattern you’ve decided on, laying a couple of square meters at a time. With some patterns, such as herringbone, you will have to cut some pavers to finish off the edges. This can be done with a block cutter (it’s best to hire this), or with a bolster.
STEP 6
Brush dry fine sand over the pavers, ensuring that as much as possible trickles between the joints. Repeat until no more sand seems to be accepted, then use a flat-plate vibrator to settle this sand between the joints.
STEP 7
Brush in more sand, and vibrate again, repeating until the paving is stable and no more sand is accepted. If you can’t hire a vibrator, you can use a board and mallet instead, but this is a more tedious method and not as satisfactory.
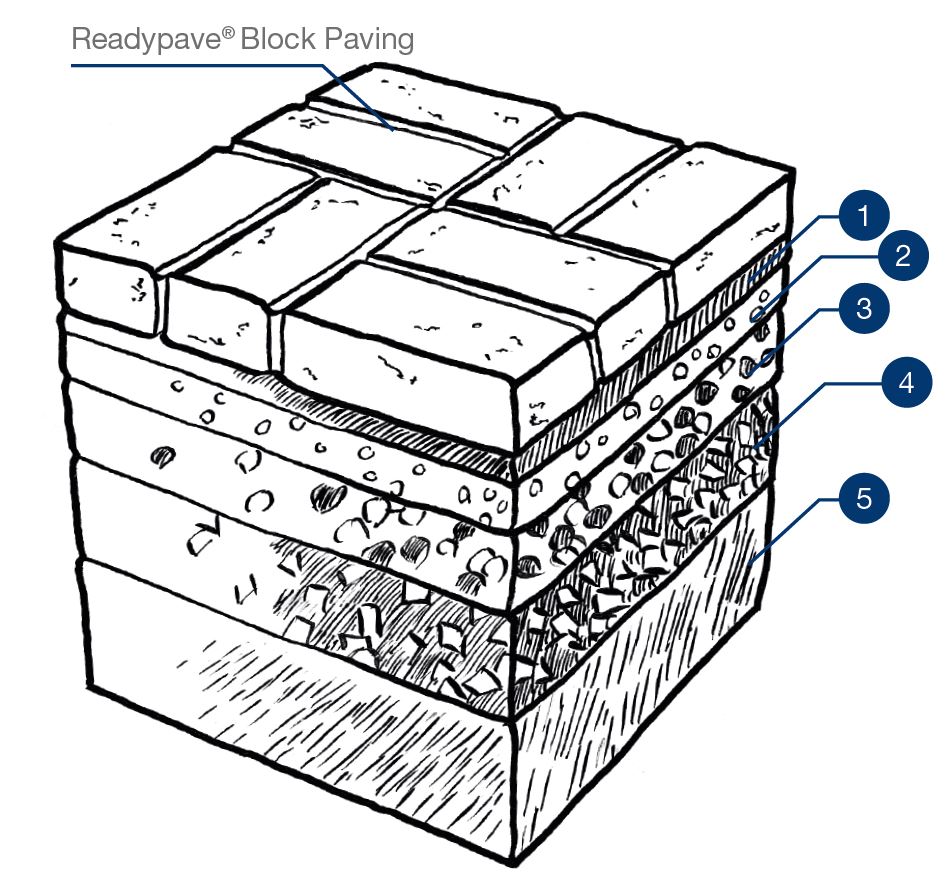
How It Works
1 LAYING COURSE (BEDDING COURSE)
A layer of sand or a 2/6mm grading to BS EN 12620* that is screeded for bedding the pavers on.
2 ROAD BASE (WHEN REQUIRED)
One or more layers above the sub-base that constitutes a structural element of a flexible or composite pavement.
3 SUB-BASE
A designed material thickness placed immediately above the Subgrade to give support to surface course. Sub-base course material can be compacted aggregate (4/20mm grading to BS EN 12620*) cement or asphalt stabilised aggregate, asphalt or concrete.
4 SUBGRADE IMPROVEMENT LAYER
A layer of granular or treated material at the top of the subgrade to provide a working surface and an improved foundation for the pavement. Also to provide a wearing platform during the construction process.
5 SUBGRADE
Part of the soil, naturally or constructed, that supports the load transmitted by the overlying pavement.
Hints & Tips
DESIGN TIPS
Use plants of varying heights to flood the garden with an abundance of charm. Pave over concrete to visually soften the surface and make it appear less rigid. Avoid overly straight walks which preclude imaginative planting. Consider negotiating elevation changes in a walkway with steps rather than a slope.
PRACTICAL TIPS
With patios, decks and foundations it is vital that the square or rectangular base is made up of right angles, at least where intended. Ensure you never walk over the sand used for bedding, even if smoothed out, this will compress the sand in areas and give you an uneven finish over time.
FINISHING TOUCHES
Kiln dried sand should be brushed over the entire area to completely fill the joints. To ensure the optimum performance and appearance of your new landscape, use Rugby® Kiln Dried Sand* which is graded to suit paving block applications. It is ideal for brushing-in, will fill joints completely (normally with one application) and will not stain your blocks like some quarry materials.